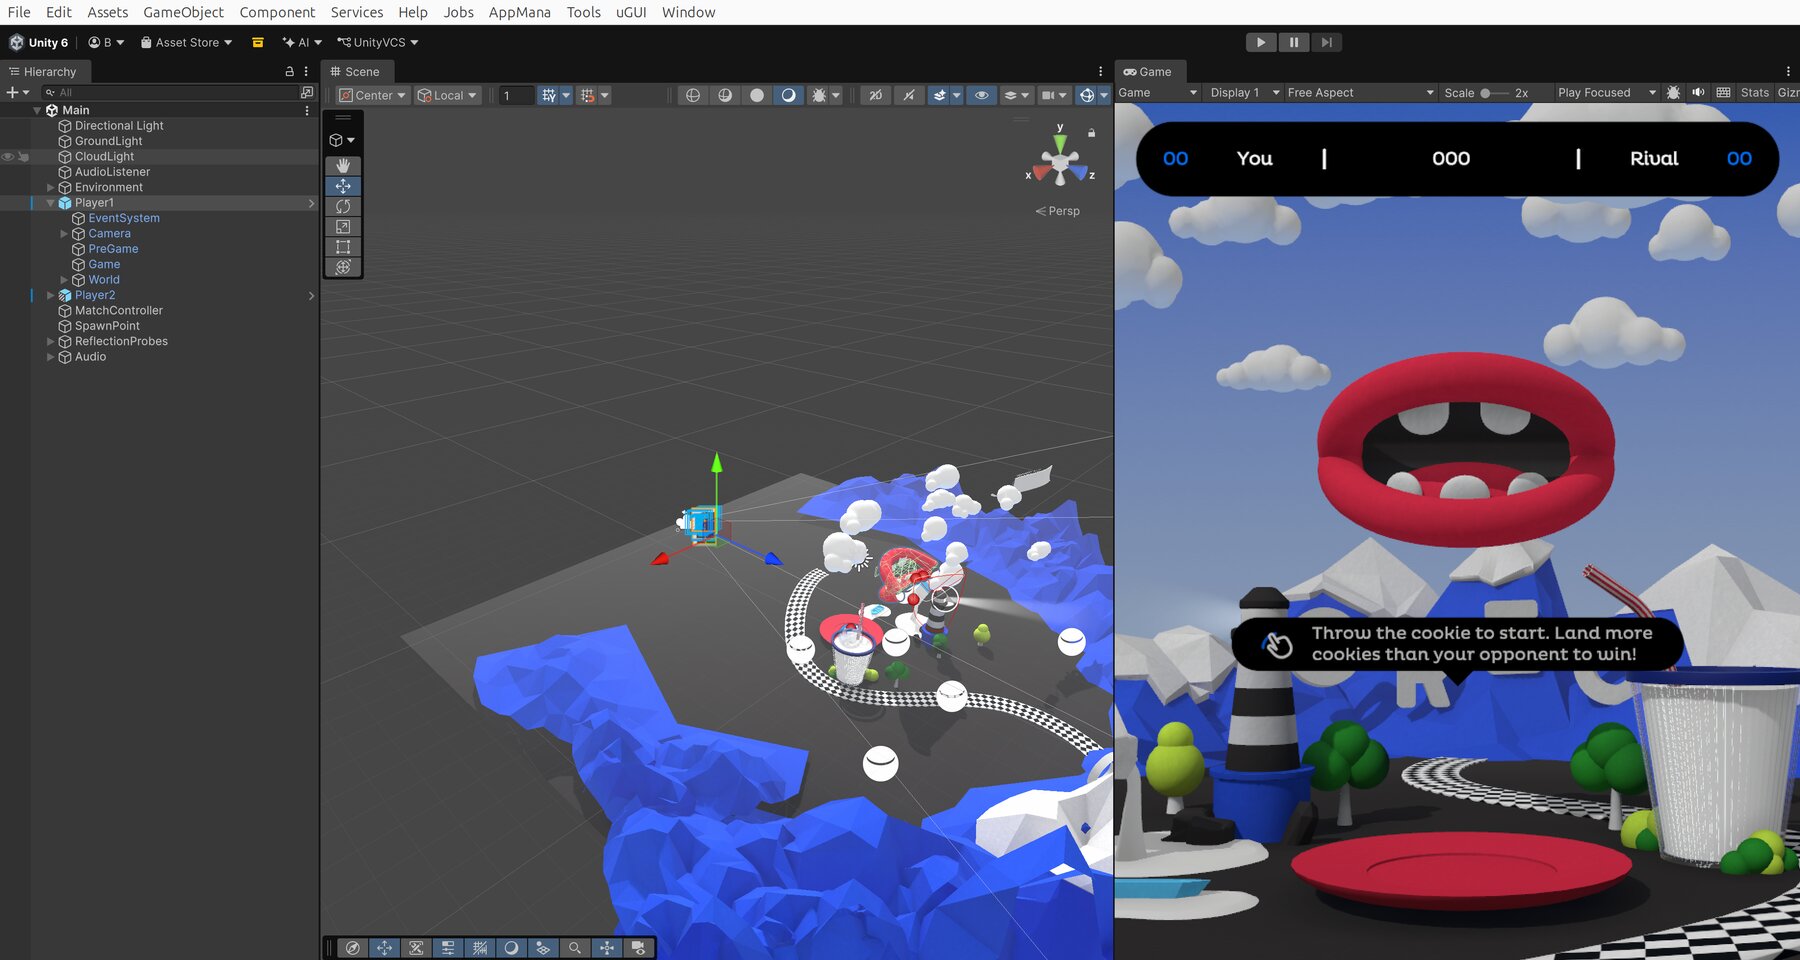
Multiplayer setup
Give each visitor an independent camera, HUD and input within a shared scene.
Set up the scene
Install the AppMana public Unity plugin. In Player Settings, set Active Input Handling to Input System Package (New) and restart the editor if prompted.
Scene
├─ Shared world
├─ Player 1
   ├─ RemotePlayableConfiguration
   ├─ Camera → Display 1
   │  └─ Canvas → Camera
   └─ MultiplayerEventSystem
└─ Player 2
   ├─ RemotePlayableConfiguration
   ├─ Camera → Display 2
   │  └─ Canvas → Camera
   └─ MultiplayerEventSystem
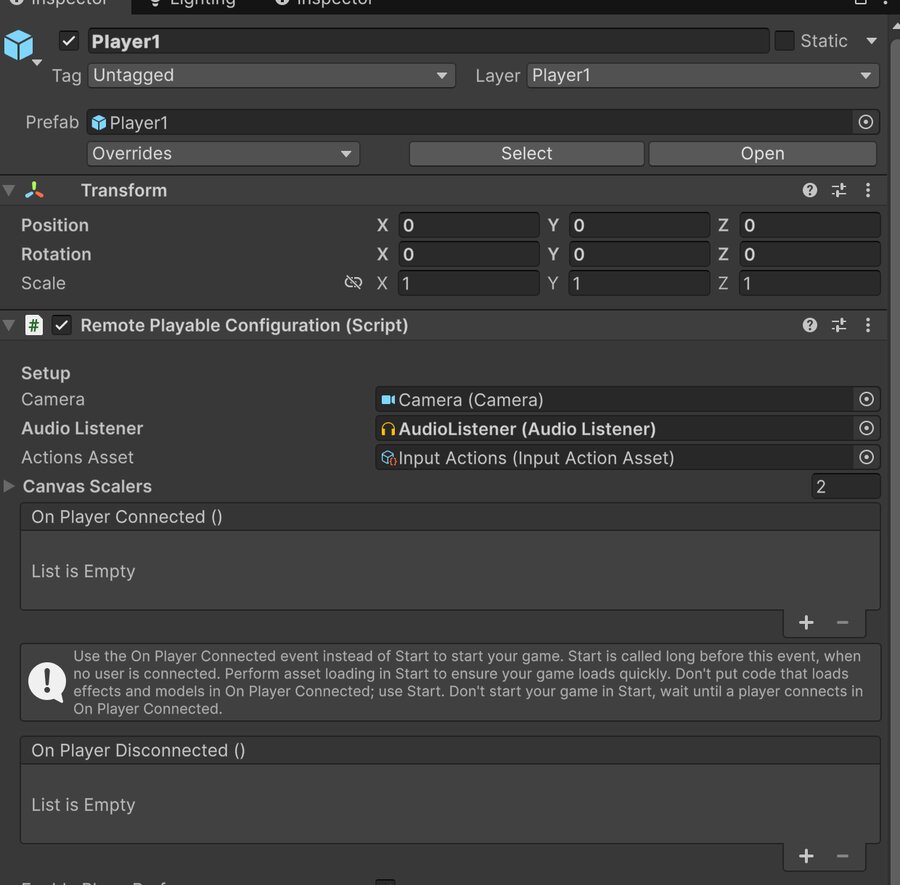
- Add RemotePlayableConfiguration to the player root. Assign its camera, audio listener, Input Actions asset and each HUD CanvasScaler in the Inspector.
- Set each HUD Canvas to Screen Space - Camera and assign the slot camera. Replace its GraphicRaycaster with PerUserGraphicRaycaster and assign the same player configuration. Use PerUserPhysicsRaycaster on the camera for clickable world objects.
- Duplicate the slot. Set the first camera to Display 1 and the second to Display 2. Give each HUD a separate layer. Each camera and physics raycaster should include the shared world and only its own slot layer. Check the duplicated references in the Inspector.
Connect the input actions
Assign the same source asset to RemotePlayableConfiguration and InputSystemUIInputModule. Bind Point to <Pointer>/position (Pass Through, Vector2) and Click to <Pointer>/press (Pass Through, Button). Assign these actions to Point and Left Click on the module, and wire Navigate, Submit and Cancel for keyboard navigation. Set Pointer Behavior to All Pointers As Is.
Give each slot its own MultiplayerEventSystem. Set Player Root to that slot’s UI subtree. In gameplay scripts read actions from the slot’s RemotePlayableConfiguration.actions after Awake so input stays paired to that visitor.
Verify the stream
Open the same multiplayer instance in two browsers. Click a different HUD control in each browser, then move both players. Both should see the shared world and receive only their own HUD and input.
Inside the Oreo project